Tutorial Intro
Let's discover Nebula in less than 2 minutes.
Getting Started#
Get started by running nebula on your localbox.
Nebula repo contains pre-built binaries built from both Ubuntu 20.04 LTS and MacOS (M1) Big Sur. (We don't offer Windows built yet)
All binaries are static linked, it should work fine on your linux box and Mac laptop. Otherwise you need need to rebuild nebula.
At nebula repo root, you can
Start up one node instance locally#
./run.shThis script will detect current user's operation system and launch the service processes by choosing the right version of pre-built binaries. After this command, you can open browser, navigate to this address:
http://localhost:8088/Now, explore Nebula through nebula UI with a preload dataset, if everything goes well, you should be able to see this:
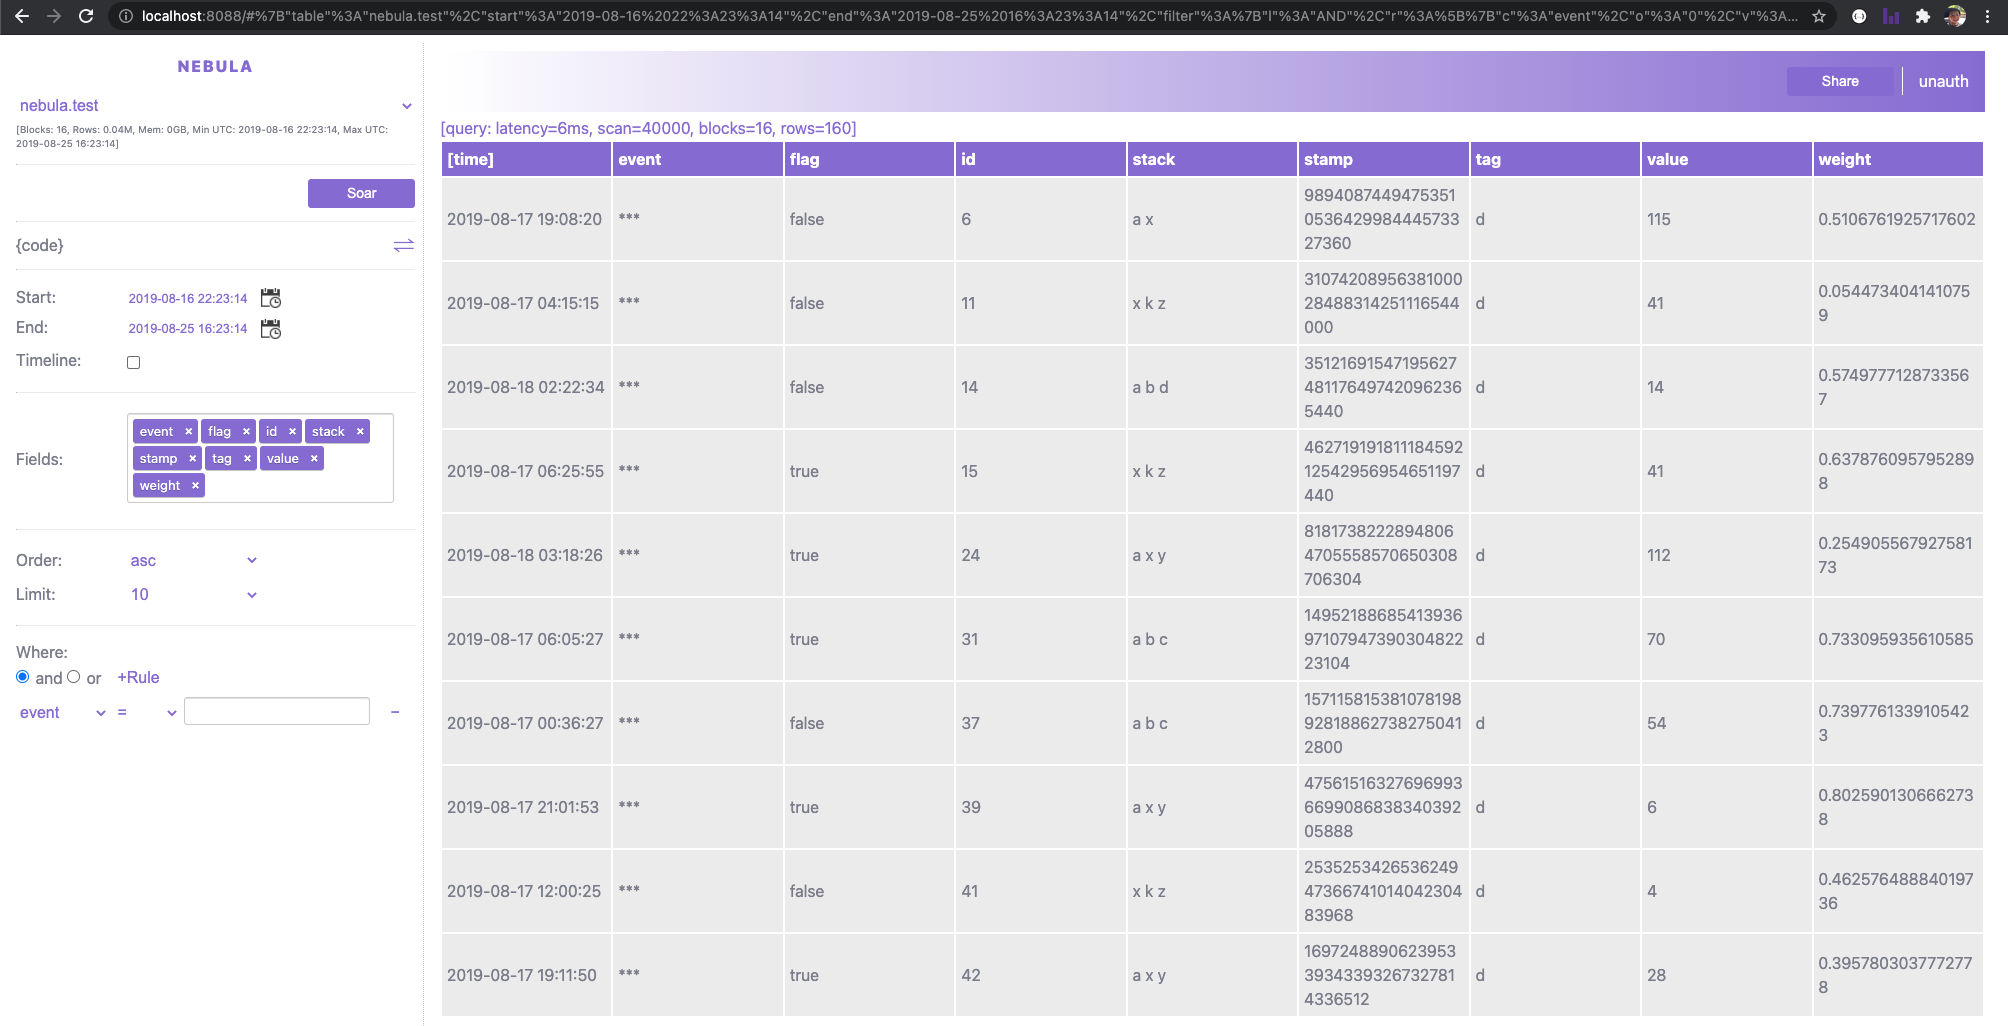
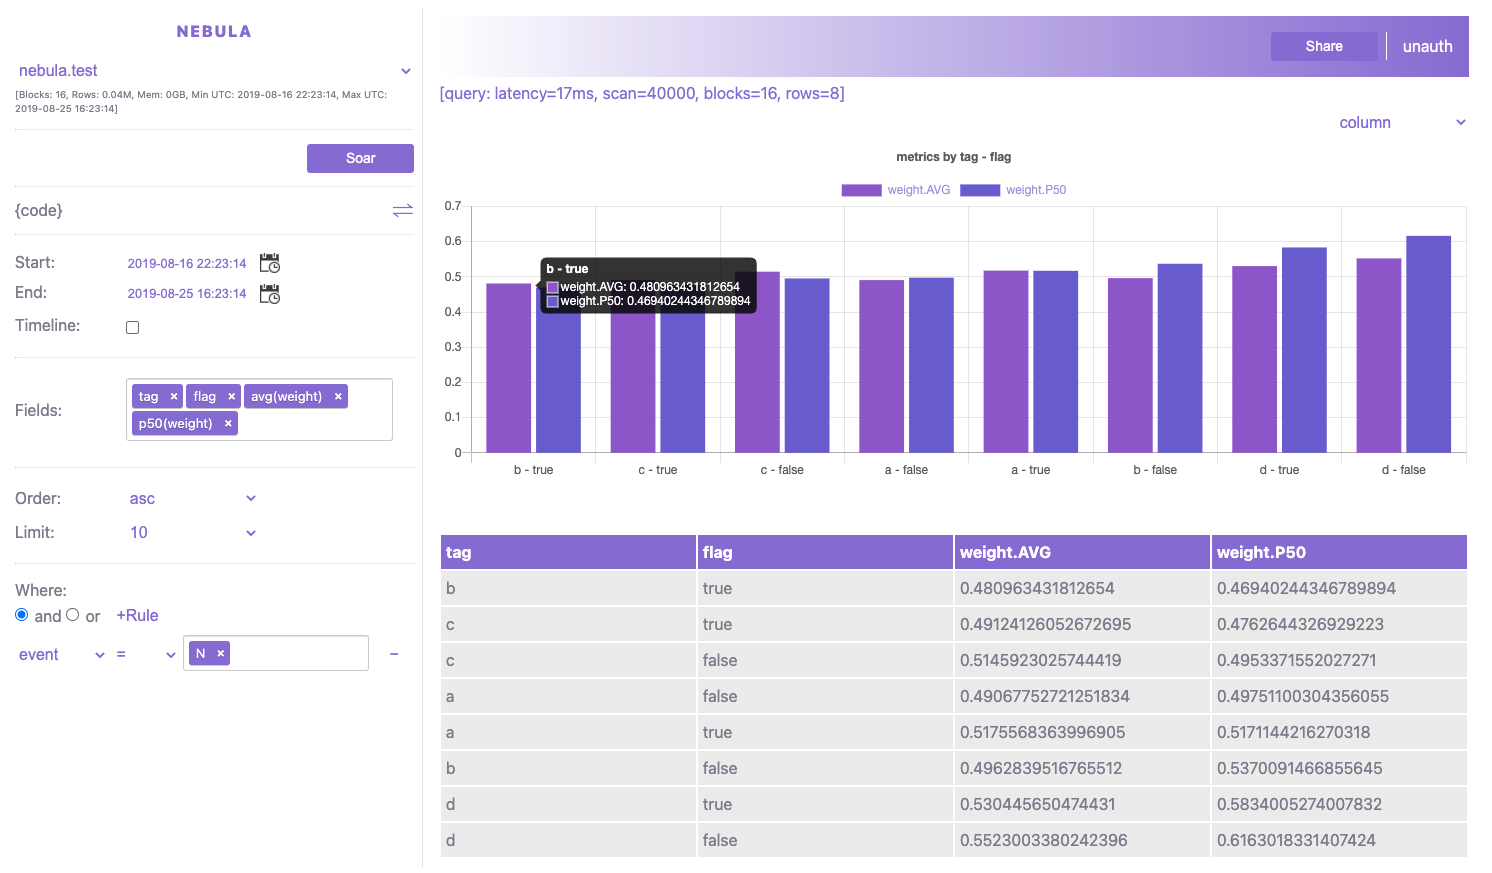
Try to put keys and metrics in the fields and see how it visualize the result of your query!
For example: see average weight and P50 weight by tag+flag combined keys when event equals 'N':
Tip: This simple script (run.sh) also shows how Nebula server communicates with all available Nebula nodes, if you work with a customized deployment environment, you can wrap the way how to launch NodeServer and NebulaServer respectively. Otherwise you can continue reading how to use Dockers and Kubernetes for cluster deployment.
Try to build#
./build.shThis script will launch either build.linux.sh or build.mac.sh, both of them install pre-required softwares and launch the build process managed by cmake.
For prerequisites installation - it uses brew on MacOs while using apt on Linux. (Tested version: Ubuntu 20.04 LTS and MacOs Big Sur + M1 Chip).
Note: there maybe changes needed if you build nebula on other untested platforms.
It will take some time if it's first time to build, after build is done, you will see all the binaries under build directory.
- NodeServer: Nebula node could be deployed to any number of machines/nodes/pods.
- NebulaServer: Nebula server is a single server communicating with all nodes.
- configs: cluster configuration folder (examples:
cluster.ymlortest.yml)
Tip: for most of the time, the config yaml file is the only place you need to onboard your use cases, customize and scale your cluster. We will learn the config file in another chapter.
Docker images#
Tip: for maintainer, before build images, make sure we have all release binaries replaced. If build using Google cloud machine, we can use scp to copy files, for example
gcloud compute scp vm1:~/nebula/build/NebulaServer ~/nebula/build/To push docker images to docker hub - run following steps on a linux box.
We peoridically release all 3 nebula docker images to docker hub under the public name columns. They are:
columns/nebula.server: Nebula server image (statically linked C++ binary).columns/nebula.node: Nebula node image (statically linked C++ binary).columns/nebula.web: Nebula Web UI image (NodeJS container).
Please check the timestamp and commit hash to see what changes included from Nebula master repo.
Feel free to use docker pull to download them from docker hub.
Currently, Nebula supports two ways for server and nodes to discover each other:
- Confgiure node list in cluster config file (e.g.
cluster.yml) if the node list is static fixed. - Configure server to be a fixed server (unchanged IP address), and pass the address to all nodes.
For details, please see Nebula Discovery
Tip: (to Nebula maintainer), the docker hub account is associated with columns.ai@gmail.com (username=columns,password=p...@w...), please use steps to release new images:
- Login:
sudo docker loginto log in before push new images.- Build: after login, use
docker-composetool to build up all images locally.
- cd
src/service, where docker-compose.yaml is located.- run
sudo docker-compose build- Tag & Publish: tag the local built images and push to docker hub.
- sudo docker tag nebula/web columns/nebula.web && sudo docker push columns/nebula.web
- sudo docker tag nebula/server columns/nebula.server && sudo docker push columns/nebula.server
- sudo docker tag nebula/node columns/nebula.node && sudo docker push columns/nebula.node
Kubernetes#
Suppose you already have a kubernetes cluster. Follow the steps below to deploy nebula in your cluster and access it from your localhost.
- Create a configuration file nebula.yaml.
cat > nebula.yaml <<EOFapiVersion: apps/v1kind: Deploymentmetadata: name: nebula-serverspec: selector: matchLabels: app: nebula-server template: metadata: labels: app: nebula-server spec: containers: - name: nebula-web image: columns/nebula.web env: - name: NS_ADDR value: "localhost:9190" - name: NODE_PORT value: "8088" - name: nebula-server image: columns/nebula.server---apiVersion: v1kind: Servicemetadata: name: nebulaspec: type: NodePort selector: app: nebula-server ports: - port: 9190 name: server targetPort: 9190 - port: 8088 name: web targetPort: 8088 nodePort: 30008---apiVersion: apps/v1kind: Deploymentmetadata: name: nebula-nodespec: replicas: 2 selector: matchLabels: app: nebula-node template: metadata: labels: app: nebula-node spec: containers: - name: nebula-node image: columns/nebula.node env: - name: NSERVER value: "nebula:9190"EOF- Create resources by applying nebula.yaml
kubectl apply -f nebula.yaml- Use port forwarding to view nebula UI from your browser.
kubectl port-forward service/nebula 8088:8088Now open http://localhost:8088 to play with nebula UI. You can scale up by simply increasing "replicas" of the deplyment nebula-node in nebula.yaml and running kubectl apply -f nebula.yaml again.